Web based School
Chapter 11
The Basics of Sound
CONTENTS
- The Physics of Sound
- Digital Sound Fundamentals
- The AU Sound Format
- Using Sound in Games
- Sound Utilities
- Creating and Editing Sounds
- Finding Sounds
- Summary
- Q&A
- Workshop
- Digital Sound Fundamentals
On Chapter 10, you created your first complete game, Traveling Gecko, which contained most of the core components found in commercial games. However, it was missing one particularly important component-sound. In toChapter's lesson, you remedy this problem by learning about sound and how to create it for your games. You don't get into too many of the technical details surrounding sound in Java; you'll learn all about that in tomorrow's lesson. The focus of toChapter's lesson is on the overall usage of sound and how to create your own sound effects.
There was a time when a game without sound might have been acceptable. I'm here to tell you that you're now living in a different time! Although Traveling Gecko is a neat game, it seems somewhat lacking without any sound effects or music. Game players have come to expect realistic sound that works hand in hand with the graphics to convey a greater sense of realism. Sound is such an integral part of computer games that you should consider it a necessary part of your design-as necessary as graphics. Understanding that, let's get started on toChapter's lesson!
The following topics are covered in toChapter's lesson:
- The physics of sound
- Digital sound fundamentals
- The AU sound format
- Using sound in games
- Sound utilities
- Creating and editing sounds
- Finding sounds
- Digital sound fundamentals
The Physics of Sound
Before getting into the specifics of sound and how to create your own, a little background on digital sound is in order. By understanding how sounds are modeled in Java, and in software in general, you gain more insight into what functionality is provided in the standard Java audio implementation. You learn all about Java audio support in tomorrow's lesson.
The first issue to tackle is understanding the physics behind sound waves. A sound wave is a mechanical wave moving through a compressible medium such as air. A sound wave is actually a result of the pressure of air expanding and contracting. In other words, a sound wave is a series of traveling pressure changes in the air. You hear sound because the traveling sound wave eventually gets to your ears, where the pressure changes are processed and interpreted by your eardrums. The softness or loudness of a sound is determined by the amount of energy in the wave. Because sound waves lose energy as they travel, you hear sounds louder up close and softer from a distance. Eventually, sound waves travel far enough to be completely absorbed by the air or some other less compressible medium such as a wall in your house.
A sound wave is a mechanical wave moving through a compressible medium such as air.
When I refer to the energy of a sound wave, I'm really talking about the amplitude of the wave. Amplitudes of sound waves are usually measured in decibels (dB). Decibels are a logarithmic unit of measurement, meaning that 80dB is 10 times louder than 79dB. This type of measurement is used because it reflects the hearing characteristics of the human ear. The threshold of human hearing is 0dB, which means that anything less is too soft to be heard by humans. Likewise, the threshold of pain is 120dB, which is the amplitude level at which humans experience physical pain. Prolonged exposure to sound this loud can cause permanent hearing damage, not to mention an annoying ringing sensation. This typically isn't a problem in computer games!
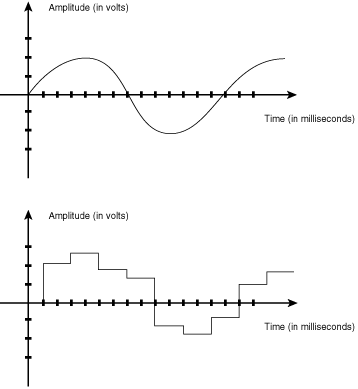
When a sound wave is converted to an electrical signal (by a microphone, for example), the amplitude is represented by a voltage. The amplitude of the voltage directly corresponds to the amplitude of the physical sound wave. As the amplitude of the wave varies, so does the corresponding voltage. In fact, the varying amplitude of a sound wave over time is all that is needed to reproduce a sound. Figure 11.1 shows a sound wave plotted as a voltage (amplitude) varying over time.
Figure 11.1 : A sound wave plotted as voltage versus time.
Digital Sound Fundamentals
When a microphone converts sound waves to voltage signals, the resulting signal is an analog (or continuous) signal. Because computers are digital machines, it is necessary to convert this analog signal to a digital signal for a computer to process. Analog to digital (A/D) converters handle the task of converting analog signals to digital signals, which is also referred to as sampling. The process of converting an analog signal to a digital signal doesn't always yield exact results. How closely a digital wave matches its analog counterpart is determined by the frequency at which it is sampled, as well as the amount of information stored at each sample.
Sampling is the process of converting an analog audio signal to a digital audio signal.
To sample a sound, you just store the amplitude of the sound wave at regular intervals. Figure 11.2 shows how an analog sound wave is converted to a digital wave by sampling the sound at regular intervals. Notice in Figure 11.2 that the digital representation of the analog sound wave is not a very good one. Taking samples at more frequent intervals causes the digital signal to more closely approximate the analog signal and, therefore, sound more like the analog wave when played.
Figure 11.2 : An analog sound wave and its digital representation.
When sampling sounds, the rate (frequency) at which the sound is sampled is very important, as well as how much data is stored for each sample. The unit of measurement for frequency is Hertz (Hz), which specifies how many samples are taken per second. In Java 1.0, the only supported sound frequency is 8,000 Hz, which means that there are 8,000 samples per second. Although it sounds like a lot, this frequency actually results in a fairly low-quality sound. To understand why, consider the fact that the frequency for CD-quality audio is 44,000 Hz.
| Note |
The limitations on sound quality imposed by Java are really a reflection of the underlying AU sound format, which is discussed in the next section. When Java widens its support for other sound formats in a future release, these limitations will likely disappear. |
The amount of data stored per sample determines the number of discrete amplitudes that a digital signal can represent. The wider the range is of amplitudes represented by the digital signal, the closer the original wave is approximated. In Java 1.0, the sample data width is limited to 8 bits. A wave sampled at 8 bits has 256 different discrete amplitude levels (28). Again, compare this to CD-quality sound, which uses 16 bits per sample and therefore has 65,536 different discrete amplitude levels (216).
The AU Sound Format
The AU sound format is currently the only sound format supported by Java. The AU name stands for ULAW, which specifies the type of encoding used to store each sample. The format is specific to Sun and NeXT computer systems, and it specifies that sounds be 8,000 Hz mono 8-bit ULAW encoded. This is a pretty low-quality sound format, especially when compared to what other formats provide.
However, within the context of the Web, the AU format is acceptable for now. This is mainly because of the ever-present bandwidth problem associated with the transfer of data over the Internet. Restricting sounds to a compact format such as AU guarantees that all sounds incur relatively low transmission times.
However, don't expect this situation to last long. Sun is already promising more complete multimedia support in a future release of Java, which will no doubt include support for more sound formats. At that point, it will be up to Web developers to balance the scale between sound quality and bandwidth delays.
Using Sound in Games
Aside from the programming issues surrounding sound in Java, which you learn about tomorrow, integrating sound into Java games consists primarily of creating or finding the right sound effects and music to fit your needs. You'll be happy to know that creating sound effects for games is often one of the most creative and fun aspects of game development, because there are very few rules. Which aspects of a game you want to associate sounds with are totally up to you. Along with that, you have complete freedom over the sounds you create and use.
Well, almost complete freedom. Actually, two limitations are imposed on sounds in games. The first limitation is communication bandwidth, which keeps you from being able to use lots of long sounds. This limitation exists because it takes time to transmit resources used by a Java game, such as graphics and sounds, over the Internet. To keep game players from having to wait an inordinate amount of time for resources to load, you should try to keep the quantity and size of sounds used by your games within reasonable limits.
The second limitation, which is a little less obvious, is that you can't use ed sounds without written permission from the owner of the . For example, sounds sampled from ed movies or audio recordings can't be used without permission. It is technically no different than using ed software without permission or a licensing agreement. So be careful when sampling sounds from ed sources.
| Warning |
Some seemingly public domain sound collections are actually ed and can get you into trouble. Most of these types of collections come in the form of an audio CD containing a variety of sound effects. Be sure to read the fine print on these CDs, and make sure you can legally reuse the sounds or get explicit permission from the publisher. |
Beyond these two limitations, you are free to do whatever you want with sounds in your game creations. Let's take a look at how you can begin experimenting with sound.
Sound Utilities
To be able to create and modify your own sounds, you need some type of software sound editing utility. Sound editing utilities usually provide a means of sampling sounds from a microphone, CD-ROM, or line input. From there, each utility varies as to what degree of editing it provides. Some sound editing utilities include very advanced signal processing features, in addition to the relatively standard amplification and echoing features.
The most important component of a good sound editor in regard to Java games is the capability to save sounds in the AU format. It doesn't matter how cool the sounds are if you can't play them with Java. Another key feature is the capability to zoom in and clip sounds down to exactly the portions you want to use. Because the length of sounds is of the utmost importance in Java games, you should always clip sounds down to the absolute minimum length possible.
The rest of this section focuses on some popular shareware sound editors that you can use to edit sounds for Java games. They all support the AU sound format and provide some degree of sound effects processing. There are also equally, or more, feature-packed commercial sound utilities out there, but I want to keep the focus on shareware because you can easily download shareware and try it out.
Cool Edit
Cool Edit, by Syntrillium Software, is a sound editor for Windows 95 that is loaded with features. Its creators have suggested thinking of it as a paint program for audio. Just as a paint program enables you to create images with colors, brush strokes, and a variety of special effects, Cool Edit enables you to "paint" with sound: tones, pieces of songs with voices and other noises, sine waves and sawtooth waves, noise, or just pure silence. Cool Edit provides a wide variety of special effects for manipulating sounds, such as reverberation, noise reduction, echo and delay, flanging, filtering, and many others.
You can get information about Cool Edit and download the latest version from the Syntrillium Software Web site, which is located at http://www.netzone.com/syntrillium. Figure 11.3 shows the Syntrillium Software Web site.
Figure 11.3 : The Syntrillium Software Web site.
Sound Exchange (SoX)
Sound Exchange (also known as SoX), by Lance Norskog, is the self-proclaimed Swiss army knife of sound editors because it provides a minimal interface but a lot of features. It functions more as a sound converter rather than a sound editor and is available for both UNIX and DOS pcs. It provides support for converting between many different sound formats, along with sampling rate conversion and some sound effects. The complete source code for SoX is also available, so if you're adventurous enough, you could port it to another platform. As if you don't have enough to keep you busy learning Java game programming!
You can get information about Sound Exchange and download the latest version from the Sound Exchange Web site, which is located at http://www.spies.com/Sox. Figure 11.4 shows the Sound Exchange Web site.
Figure 11.4 : The Sound Exchange sound utility Web site.
Sound Machine
Sound Machine, by Rod Kennedy, is a Macintosh sound editor with lots of conversion and sound effects features. Mr. Kennedy is also working on some interesting Netscape plug-ins that will interact with Sound Machine. Pretty neat!
You can get information about Sound Machine and download the latest version from the Sound Machine Web site, which is located at
http://online.anu.edu.au/RSISE/teleng/Software/SoundMachine/welcome.asp
Figure 11.5 : The Sound Machine sound editor Web site.
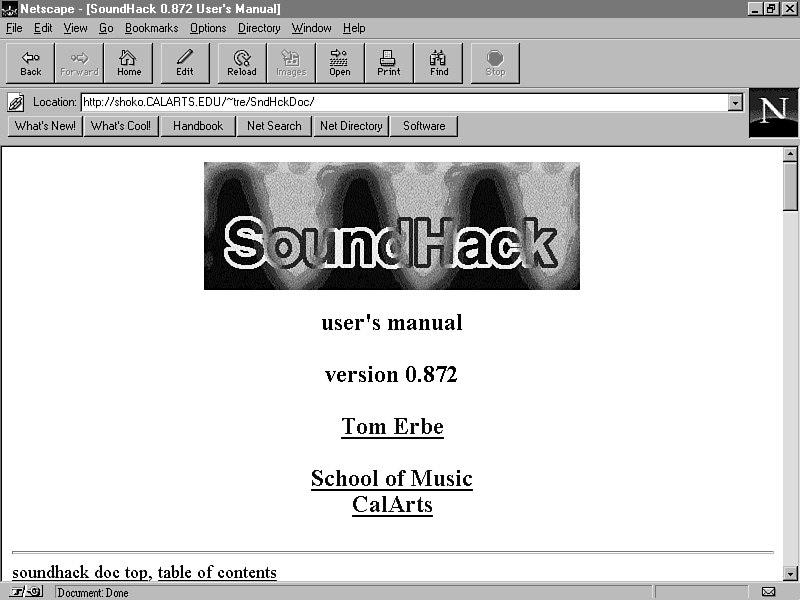
Sound Hack
Sound Hack, by Tom Erbe, is another Macintosh sound utility with a wide variety of neat features. Unlike Sound Machine, however, Sound Hack is more of a sound processor, and it leans toward more esoteric sound processing features. For example, Sound Hack includes processing effects such as pitch shifting, binaural filter spatialization, and spectral mutation, among others. If you have no idea what these features are, just grab a copy of Sound Hack and try them out for yourself!
You can get information about Sound Hack (including online documentation) and download the latest version from the Sound Hack Web site, which is located at http://shoko.CALARTS.EDU/~tre/SndHckDoc. Figure 11.6 shows the Sound Hack Web site.
Figure 11.6 : The Sound Hack sound processor Web site.
Creating and Editing Sounds
After you've decided on a sound utility, you're ready to start creating and editing sounds. The first decision to make is how you will create the sounds. For example, are you planning to record sounds yourself with a microphone or sample sounds from a stereo cassette deck or VCR? The microphone is probably the easiest route, because many multimedia computers come equipped with one. It's also the most creative route. However, you might already have some sounds in mind from a prerecorded cassette, CD, or movie, which means that you need to look into connecting an external sound source to your computer. This is covered in detail a little later in toChapter's lesson.
Regardless of where you sample sounds from, the process of getting a sampled sound cleaned up for use in a game is basically the same. After you've sampled a sound, play it back to make sure that it sounds okay. It's likely that the sound will be either too loud or too soft. You can judge whether the volume of the sound is acceptable by looking at the waveform displayed in the sound editor. If the sound amplitude goes beyond the top or bottom of the waveform display, you know it's definitely too loud. If you can barely hear it, it's probably too soft. To remedy this problem, you can either adjust the input level for the sound device and resample the sound or try to use amplification effects provided by the sound utility.
The waveform of a sound is the graphical appearance of the sound when plotted over time.
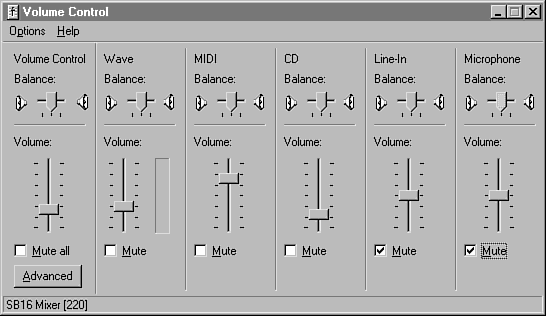
The best way to fix the volume problem is to adjust the input level of the sound device and resample the sound. For example, in Windows 95 you can easily adjust the microphone or line input level using the Volume Control application (see Figure 11.7).
Figure 11.7 : The Windows 95 Volume Control application.
After you have the volume of the sound at a level you like, you need to clip the sound to remove unwanted portions of the sound. Clipping a sound involves zooming in on the waveform in a sound editor and cutting out the silence that appears before and after the sound. This helps shorten the length of the sound and prevents unnecessary latency.
Clipping is the process of removing unneeded parts of a sound, such as silence at the beginning and end.
| Note |
Latency is the amount of time between when you queue a sound for playing and when the user actually hears it. Latency should be kept to a minimum so that sounds are heard when you want them to be heard without any delay. Unnecessary silence at the beginning of a sound is a common cause of latency problems. The other, less controllable, cause is the audio mixing support in Java itself. |
When you have a sound clipped, it should be ready for prime time! You might want to check out the kinds of effects that are available with the sound utility you are using. Some simple effects range from reverse to echo, with more advanced effects including fading and phase shifts. It's all up to your imagination and your discerning ears!
Recording with a Microphone
If you are recording sounds with a microphone, you can get much better results by covering the microphone with soft foam, like the kind found on some portable earphones. Some microphones already have foam covers. The foam cover greatly reduces the hiss caused by blowing on the microphone. It seems that no matter how careful you are, you always end up blowing into the microphone a little. This causes a noisy hiss unless you have the microphone covered. You can tape tissue over the microphone if you can't find any foam.
After you have the microphone set up for recording, prepare to throw convention aside and get creative. It's really amazing what can be done with a microphone and a little reckless abandon! You can come up with some pretty neat sound effects just by being creative with everyChapter household items. Let's take a few examples.
If you need gunshots or simple explosions, try tapping the microphone on a table. You can get different sounds by hitting it harder or softer and by trying different surfaces. Please don't hold me responsible if you beat your microphone to death on a table, though! You'll notice that harder surfaces generate sharper sounds. Because most gunshot sounds are repeated often, it's nice to have them as short and sweet as possible. The sharp sounds generated by a hard surface work pretty well for this.
If you're looking for more realistic explosions that actually fade out, you're going to have to perform a little. Hold your hand around the microphone and make a rough, blowing sound into your hand. After a little practice, you can get pretty realistic explosion sounds with this method. Just make sure no one's around when you're practicing!
If you need mechanical sounds, look no farther than your kitchen appliances. You probably don't want to drag your whole computer into the kitchen, which means you'll be limited to portable appliances. However, that still leaves a lot of opportunities. My juicer makes sounds that easily could pass for some interesting futuristic weapons. How about opening a bottle of soda? Sounds an awful lot like hydraulic brakes, doesn't it? Or maybe the huff or puff of a big alien?
What if you need some background sounds? I know I could open my window on many nights and record the sound of crickets chirping all night long. Although less dramatic, cricket sounds can add a lot to the realism of a night scene in a game. That is, until dogs start barking!
The goal here isn't to go through an exhaustive description of every possible thing you can use to create sounds. I mainly just want to spark your imagination so that you can start thinking about what you can do with things that are readily available. That's the beauty of creating games. You can turn otherwise ordinary things into interesting elements of a game. Think about all the things you hear on a daily basis. Then go through your house and make notes of what sounds you could create with different items. You'll find that this process can be a lot of fun. It's even better after you've incorporated the sounds into a game and people ask where the sounds came from.
Sampling from External Sound Sources
Another very useful method for finding sound effects for games is to sample sounds from external sound sources such as VCRs and CD players. Before I say any more, let me reiterate that it is illegal to distribute sounds sampled from movies or ed CDs or cassettes without getting permission.
Sampling sounds from external sound sources requires a little more work than recording them with a microphone, but not much. Basically, the extra work is in connecting the external sound source to your computer. You connect external sound sources via a line input on your computer; most multimedia computer systems these Chapters have a line input for receiving analog audio. For example, Soundblaster sound cards on pcs have a line input jack that can be used to connect a stereo cassette deck or VCR. To see whether your computer has a line input jack, look at the back of your computer. If you have speakers hooked up, they are probably plugged in very close to the line input jack. Look for one or more jacks labeled input. On pcs equipped with Soundblaster family sound cards, the word input usually accompanies the input jack. Input jacks are usually the same type of mini connectors used for headphones on a portable Walkman.
After you determine where the line input jack is located, plug in the line out cable from the sound device from which you want to sample sounds. The only problem is that the connectors are usually of differing types. The type of connector used by most audio equipment-including cassette decks, CD players, and VCRs-is called an RCA connector. You need to go to an electronics store and buy a cable that allows you to connect the RCA sound device to the mini input jack on your computer. You might also want to pick up an RCA extension cable so that you don't have to stack the sound device on top of your monitor!
When you get the cables squared away, plug the RCA end into the line output of the sound device, and the mini end into the input jack on the back of your computer. Then fire up the sound utility and get ready for some fun. From this point on, it's pretty much the same as recording sounds using a microphone, except that the sound device is generating the sound rather than you. The sound utility doesn't really care where the sound is coming from; it knows only to look at the input jack and grab whatever sound information is there.
If a sound doesn't sound right after you sample it, it's probably because you have the cable plugged into the microphone input rather than the line input. Try switching inputs (if you have another one) and trying again. If it sounds okay this time, you're set. If not, don't worry because there are work-arounds.
If you only have a microphone input, you need to make an adjustment to record sounds from other input devices because microphone inputs are designed to deal only with low-amplitude signals. The signals from other sound devices can easily overwhelm a microphone input jack. The solution is to somehow alter the incoming signal so that it comes in at around a microphone level. The easiest fix is to lower the input level of the sound source in software. An example of this is using the Volume Control application in Windows 95.
If you aren't so lucky to be able to fix things in software, you can adjust the output level of the sound device by passing it through an audio mixer. If you don't have an audio mixer handy, your best bet is to buy an attenuator connector. Attenuator connectors adjust the signal level down to a level that will work for a microphone input. You can find attenuator connectors at most electronics stores.
An attenuator is an electronic device or circuit that lowers the magnitude of an electric signal. In the case of audio signals, an attenuator results in a decrease in volume.
After you have the technical difficulties out of the way, you can focus on the creative end of sampling sounds. When it comes to movies, I tend to favor war movies for finding gunshots and explosions, for obvious reasons. Science fiction movies are great for space sounds and other weird effects. The range of sounds that can be found in movies is practically unlimited.
One advantage of sampling sounds from movies is that they typically are of very high quality. Companies exist that do nothing more than create sounds for movies. For this reason, movies provide probably the richest variety of sounds available. Typically, every sound you hear in a movie has been carefully placed there. The problem, of course, is that they are protected by law, which means that you can't just run around ripping sounds out of movies and putting them into your games.
Finding Sounds
If you've decided that you don't have what it takes to create your own sounds, you still have options. In this case, you need to seek an outside source for your sounds. The best source for finding prerecorded sounds is in sound archives on the Web. Many different sound archives are out there with a vast amount of sounds to choose from. Many are even available already in the AU sound format. Even if you get sounds from a sound archive, be very careful about the issues surrounding using them.
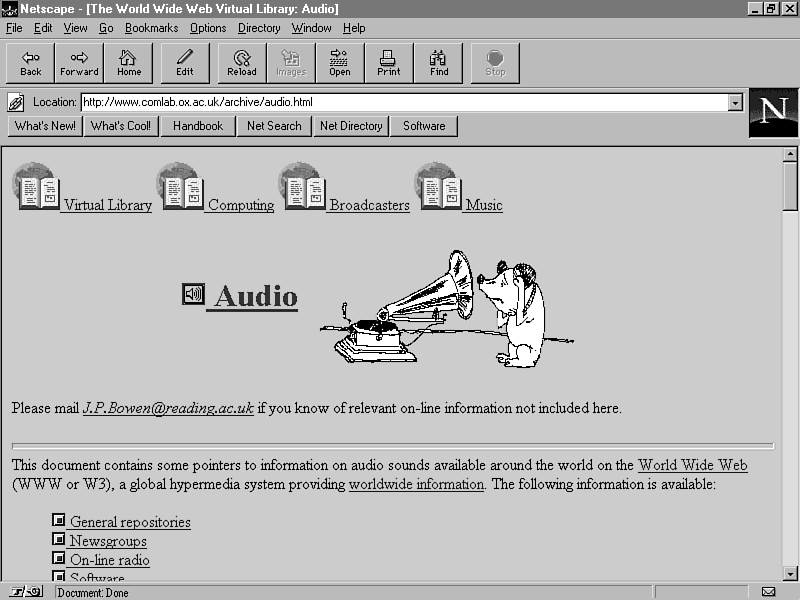
A good starting point for finding sounds is the World Wide Web Virtual Library, which maintains an Audio page with links to sound archives. This Audio Web site is located at
Figure 11.8 shows what the WWW Virtual Library Audio Web site looks like.
Figure 11.8 : The World Wide Web Virtual Library Audio Web site.
Summary
ToChapter you took a step away from the details of Java coding to learn about sound and how it can be created for games. You began with the physics of sound and followed it up with the basics of digital sound representation and the AU sound format supported by Java. You then saw where you could get some shareware sound utilities that enable you to record and edit your own sounds. You finished up by learning about creative outlets for creating your own sounds, both from scratch and also from existing sources.
I hope toChapter's lesson gave you a break from technical programming details, along with providing a creative surge for you to go out and create some interesting sounds. My main goal was to remind you that games are all about fun-and not just from a player's perspective. The more you enjoy the process of creating games, the more fun they will probably end up being. Sound creation is only one of the aspects of game development that can be both challenging and fun.
Just in case you forgot that this guide is about Java, tomorrow's lesson turns your attention toward the specifics of playing sound in Java. Don't worry; it's a lot easier than you might suspect!
Q&A
| Q | What's the difference between sampled sound and sampled music? |
| A | Technically, there is no difference; they are both sampled as digital audio and stored in the AU sound format. However, sampled music is usually designed to be relatively short in length and sampled so that it can be looped repeatedly to sound like a longer piece of music. The trick then is to sample music sounds so that they end similarly to how they begin, thereby smoothing out the looping effect. |
| Q | Can I record sounds from an audio CD in an internal CD-ROM drive? |
| A | Certainly! As a matter of fact, this is an ideal scenario because you bypass the whole issue of connecting an external sound device through an input jack. Typically, this simply involves adjusting the volume of the CD-ROM appropriately and sampling just as if you were using the microphone. |
| Q | What if I find a bunch of neat sounds but they are stored in a different sound format, such as WAV? |
| A | You need to convert them to the AU sound format to be able to use them with Java. This is usually as easy as loading them into a sound utility and saving them as an AU file type. |
Workshop
The Workshop section provides questions and exercises to help strengthen your grasp of the material you learned toChapter. Try to answer the questions and at least go over the exercises before moving on to tomorrow's lesson. You'll find the answers to the questions in appendix A, "Quiz Answers."
Quiz
- What is a sound wave?
- What is an analog to digital converter used for in regard to sampling sounds?
- What is the sampling frequency for the AU sound format?
- What is latency?
- What is an analog to digital converter used for in regard to sampling sounds?
Exercises
- Find a sound utility capable of recording and editing sounds.
You'll need it!
- Try your hand at creating some sounds of your own with a microphone.
- Sample some sounds from an external sound device, making sure to get the volume level settings correct.
- Try applying some special effects in the sound utility to your newly sampled sounds.
- Try your hand at creating some sounds of your own with a microphone.


Popular Tutorials
-
 MS Access
1109
MS Access
1109
-
 C++
1222
C++
1222
-
 HTML
584
HTML
584
-
 JavaScript
616
JavaScript
616
-
 Vbscript
873
Vbscript
873
-
 Oracle
473
Oracle
473
-
 VC++
875
VC++
875
-
 SQL
2959
SQL
2959
-
 XML
514
XML
514
-
 Java
814
Java
814
-
 Perl
455
Perl
455
-
 Linux
451
Linux
451


